

National Geographic telescopes‚ like the NT114CF‚ offer high-quality optics and user-friendly designs‚ making them ideal for both beginners and experienced astronomers. With features like 114mm aperture‚ these telescopes provide crisp‚ clear views of celestial objects‚ ensuring an immersive stargazing experience for all skill levels.

Key Components of National Geographic Telescopes
National Geographic telescopes feature essential components like optical tubes‚ EQ/AZ mounts‚ sturdy tripods‚ interchangeable eyepieces‚ and diagonal mirrors‚ ensuring optimal performance for astronomy enthusiasts.

Aperture and Magnification
The aperture‚ or diameter of the primary mirror‚ is crucial for gathering light and resolving detail. Models like the National Geographic NT114CF feature a 114mm aperture‚ ideal for observing planets‚ stars‚ and galaxies. Magnification depends on the eyepiece used‚ with higher magnifications offering closer views but requiring stable conditions. The 90-65000 model‚ for instance‚ offers 167x magnification‚ providing sharp images of celestial objects. A larger aperture allows more light‚ enhancing image brightness and clarity‚ while manageable magnification ensures practical usability. These specifications cater to both beginners and advanced users‚ offering versatility for various astronomy needs.

Eyepieces and Barrel Sizes
Eyepieces are essential for optimizing your viewing experience. National Geographic telescopes often come with interchangeable eyepieces‚ such as 6mm and 20mm options‚ allowing users to adjust magnification based on their needs. The barrel size of these eyepieces is standardized‚ typically 1.25 inches or 2 inches‚ ensuring compatibility with most telescope models. Larger barrel sizes‚ like 2 inches‚ enable more light to enter‚ improving image brightness and field of view. The combination of the right eyepiece and barrel size enhances clarity and comfort during stargazing. This versatility makes National Geographic telescopes adaptable for observing a wide range of celestial objects‚ from planetary details to deep-sky phenomena.

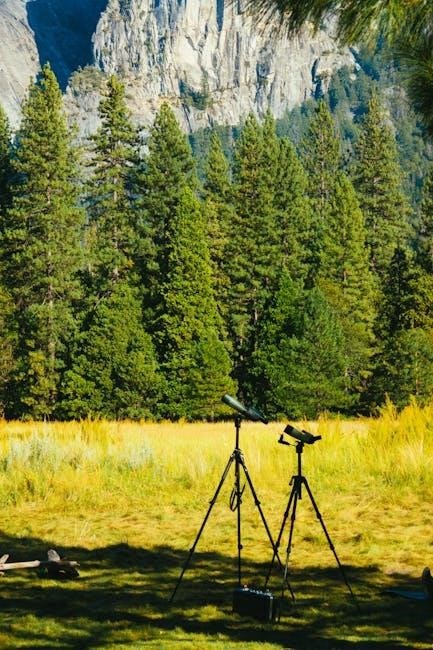
Types of Mounts (EQ and AZ)

National Geographic telescopes feature two primary types of mounts: Equatorial (EQ) and Altazimuth (AZ). The EQ mount is designed for astronomical observation‚ aligning with the Earth’s axis to track celestial objects smoothly. It’s ideal for long-term stargazing and astrophotography. The AZ mount‚ while simpler‚ offers easy maneuverability in altitude and azimuth‚ making it perfect for terrestrial and casual celestial viewing. Both mounts are durable‚ ensuring stability and precise adjustments. The EQ mount’s advanced tracking capabilities cater to serious astronomers‚ while the AZ mount’s user-friendly design suits beginners. Each mount type enhances the overall functionality of the telescope‚ providing a tailored experience for different observational needs and preferences.
Diagonal Mirrors and Their Function
The diagonal mirror in National Geographic telescopes plays a crucial role in redirecting light from the primary mirror to the eyepiece. This mirror is angled at 90 degrees‚ ensuring that the light path is diverted upward‚ allowing users to observe celestial objects comfortably without needing to adjust their viewing position excessively. The diagonal mirror also helps in maintaining image orientation‚ though it may cause the image to appear mirrored horizontally. This feature is particularly useful for astronomical observations‚ where the orientation of the image is less critical than its clarity and detail. By integrating the diagonal mirror‚ National Geographic telescopes enhance the overall viewing experience‚ providing sharp and focused images of celestial bodies for both beginners and experienced astronomers alike.
Setting Up Your National Geographic Telescope
Begin by unpacking and inventorying all components‚ ensuring nothing is missing. Assemble the tripod and mount‚ then attach the telescope tube‚ following the manual’s step-by-step guide. Securely tighten all parts using the provided tools‚ such as Allen wrenches‚ and ensure the setup is level for proper operation. Finally‚ align the finderscope with the telescope to achieve accurate targeting of celestial objects‚ and refer to the manual for any specific adjustments needed to optimize performance.

Unpacking and Inventorying the Components
When you receive your National Geographic telescope‚ carefully unpack all components from the box. Check for any visible damage and ensure all items are included‚ such as the telescope tube‚ tripod‚ mount‚ eyepieces‚ and manual. Refer to the instruction manual to verify the complete list of parts. Organize the components on a clean‚ flat surface to avoid losing small pieces like screws or Allen wrenches. Pay attention to fragile optics‚ handling them with care to prevent scratches or damage. Once everything is unpacked‚ cross-reference each item with the manual’s inventory list to confirm nothing is missing. This step ensures a smooth assembly process and helps identify any potential issues early on. Proper organization and verification are crucial for a successful setup.
Assembling the Telescope Tripod and Mount
Begin by assembling the tripod on a flat‚ stable surface. Attach the telescope mount to the tripod using the provided screws and an Allen wrench. Ensure the mount is securely tightened to prevent any wobbling. Next‚ carefully place the telescope tube onto the mount‚ aligning the dovetail bar with the mount’s clamp. Secure the tube using the retaining screws‚ making sure not to overtighten. For EQ mounts‚ balance the telescope by sliding it along the dovetail bar until it remains steady when released. For AZ mounts‚ simply attach the tube and tighten the locking knob. Double-check all connections for stability and proper alignment before proceeding. This step is critical for achieving precise control and clear observations.
Maintenance and Care Tips
Regularly clean the optics with a soft cloth and avoid harsh chemicals. Store the telescope in a dry‚ cool place to prevent moisture damage. Handle with care to maintain alignment and ensure longevity;
Cleaning the Optics and Accessories
Regular cleaning of your National Geographic telescope’s optics and accessories is essential for maintaining clarity and performance. Use a soft‚ dry microfiber cloth to gently remove dust from the primary mirror‚ eyepieces‚ and diagonal. Avoid using harsh chemicals or abrasive materials‚ as they can damage coatings or scratch surfaces. For stubborn smudges‚ lightly dampen the cloth with distilled water‚ but ensure no moisture remains to prevent fogging or mold. Store the telescope in a dry‚ cool environment to reduce humidity and minimize dust accumulation. Clean the exterior components with a mild soap solution‚ then rinse and dry thoroughly. Proper care ensures your telescope remains in optimal condition for years of stargazing enjoyment.

Troubleshooting Common Issues
Blurry images and alignment problems are common. Check mirror alignment‚ ensure optics are clean‚ and verify eyepiece compatibility. Consult the manual for detailed adjustment and cleaning guidance.

Resolving Blurry Images and Alignment Problems
Blurry images and alignment issues are common challenges. First‚ ensure the telescope’s diagonal mirror is clean and free of debris‚ as dirt can distort the light path. Adjust the focus knob slowly and precisely to achieve clarity. If using an eyepiece‚ verify its compatibility with your telescope’s barrel size and magnification capabilities. Misaligned mirrors or improper collimation can cause blurry images; refer to the manual for collimation instructions. Clean the optics with soft‚ dry cloths to prevent smudges. Check for loose screws in the mount or tripod‚ as instability can disrupt alignment. Finally‚ ensure the telescope is set up on a level surface and avoid observing through glass windows‚ as this can introduce distortions; Regular maintenance and proper setup are key to resolving these issues effectively.
Resources and Support
National Geographic telescope users can access detailed manuals and guides on websites like Manuals.ca and Manua.ls. These resources offer troubleshooting tips‚ setup instructions‚ and comprehensive support for optimal telescope performance.
Downloading Manuals and User Guides
National Geographic telescope manuals are readily available online‚ providing comprehensive setup‚ usage‚ and troubleshooting instructions. Websites like Manuals.ca and Manua.ls offer free downloads for popular models such as the NT114CF‚ 90-65000‚ and 114/500. These manuals are packed with detailed diagrams‚ specifications‚ and tips to enhance your stargazing experience. Users can easily search by model number or product category to find the exact guide they need. With ratings like 9.1 for the 90-65000 model‚ these resources are trusted by astronomers of all levels. Downloading the manual ensures you have instant access to essential information‚ helping you maximize your telescope’s performance and enjoy clearer‚ sharper views of the night sky.
Contacting Manufacturer Support
If you encounter issues with your National Geographic telescope‚ reaching out to manufacturer support is straightforward. Bresser‚ the producer of many National Geographic models‚ offers assistance through their official website. You can find contact details‚ troubleshooting guides‚ and FAQs on their support page. Additionally‚ resources like Manuals.ca provide platforms to ask questions and engage with other users‚ fostering a community-driven approach to problem-solving. Whether you need clarification on setup or have technical queries‚ support channels are available to ensure your telescope performs optimally‚ helping you continue exploring the cosmos with confidence and clarity.