

The PleurX catheter is a medical device used for draining excess fluid from the pleural or abdominal space. It allows patients to safely and effectively manage fluid buildup at home, reducing discomfort and improving breathing. Since 1997, it has provided relief to over 300,000 patients worldwide. Proper training and caregiver assistance are essential for successful use and to prevent complications.

1.1 What is a PleurX Catheter?
A PleurX catheter is a medical device used to drain excess fluid from the pleural or abdominal space. It is a tunneled catheter designed for long-term use, allowing patients to manage fluid buildup at home. The catheter is connected to a vacuum bottle that removes fluid safely and effectively. It contains natural rubber latex, so patients with allergies must take precautions. Proper care and maintenance are essential to ensure functionality and prevent complications.
1.2 Importance of Proper Drainage Techniques
Proper drainage techniques are crucial to ensure safe and effective fluid removal. Improper methods can lead to complications, such as infection, air entry, or catheter damage. Using sterile supplies and following step-by-step instructions helps prevent contamination. Monitoring fluid flow and volume is essential to avoid over-draining. Patients should stop if pain occurs and seek medical advice if issues arise. Proper technique ensures patient safety and maintains catheter functionality for long-term use;
Preparing for PleurX Drainage
Gather all necessary supplies, including the vacuum bottle, drainage line, and sterile wipes. Wash hands thoroughly with soap and water to maintain sterility. Ensure the caregiver is available to assist, especially during the initial sessions. Proper preparation helps ensure a safe and effective drainage process.
2.1 Gathering Necessary Supplies
To begin, collect all essential items, including the PleurX drainage kit, vacuum bottle, drainage line, sterile gloves, alcohol pads, and gauze. Ensure the drainage line is compatible with the catheter and that the vacuum bottle is sterile and ready for use. Having all supplies organized and within reach helps streamline the process and minimize delays. Verify that all items are unexpired and properly packaged before proceeding.
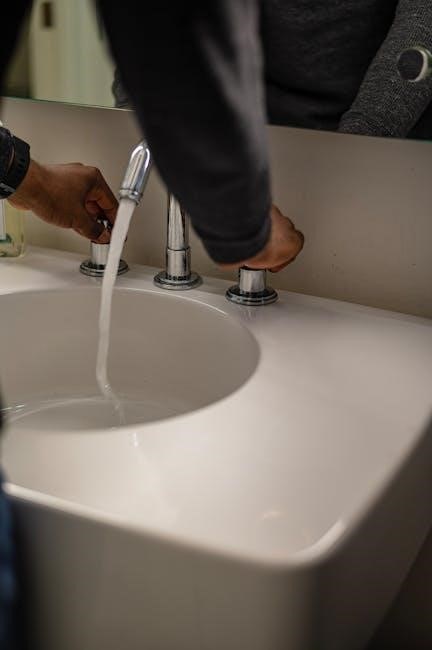
2.2 Washing Hands and Maintaining Sterility
Wash your hands thoroughly with antibacterial soap and water before starting the drainage process. Dry completely to prevent moisture from compromising sterility. Wear sterile gloves to handle the catheter and supplies. Clean the catheter site with an antiseptic solution to minimize infection risk. Maintain a clean environment around the catheter to ensure safe and effective drainage. Proper hand hygiene and sterility are critical to preventing complications.
Step-by-Step Drainage Process
Attach the PleurX catheter to the vacuum bottle, ensuring a secure connection. Use the clamp to control fluid flow. Monitor the bottle for filling and stop if pain occurs. Follow the steps carefully to avoid contamination and ensure effective drainage. Always have a caregiver assist, especially during initial sessions, to maintain safety and sterility throughout the process.
Attach the drainage line to the PleurX catheter by aligning the access tip with the valve. Gently insert the tip into the valve until it clicks securely. Ensure no air enters the line. Clean the connection with an alcohol pad to maintain sterility. Once connected, verify the line is free from kinks and properly positioned. This step is crucial for effective fluid drainage and preventing contamination.
3.2 Using the Vacuum Bottle for Fluid Removal
3.1 Connecting the Drainage Line to the Catheter
Attach the drainage line to the PleurX catheter by aligning the access tip with the valve. Gently insert the tip until it clicks. Ensure no air enters. Clean with alcohol for sterility. Check for kinks and proper positioning. This ensures effective drainage and prevents contamination. Secure the connection and open the clamp when ready. Monitor flow and volume, stopping if pain occurs. Ensure the vacuum bottle is correctly attached for suction.
3.3 Monitoring Fluid Flow and Volume
Monitor the fluid flow and volume during drainage. Stop if pain occurs or if fluid flow slows significantly. Use the vacuum bottle’s graduated markings to track the amount of fluid drained. Do not exceed 1,000mL from the chest or 2,000mL from the abdomen per session. If flow stops, check for kinks or blockages. Record the volume and appearance of the fluid for medical review. Ensure the bottle is sealed properly after use to maintain sterility.
Securing the Catheter After Drainage
After drainage, close the clamp and pull the access tip out of the catheter valve. Clean the area with an alcohol pad and apply a self-adhesive dressing to secure the site.
4.1 Properly Closing the Clamp
Close the clamp firmly by rolling it upward to prevent air from entering the catheter or fluid from leaking out. Ensure it is tightly sealed to maintain sterility and avoid complications. If pain occurs during drainage, stop immediately and consult your healthcare provider. Proper clamping is crucial for maintaining the integrity of the catheter and ensuring safe, effective drainage.
4.2 Dressing and Securing the Catheter Site
After closing the clamp, place a foam catheter pad around the catheter and wind the catheter on top of the pad. Cover it with gauze pads and apply a self-adhesive dressing to secure everything in place. Ensure the site is clean and dry to prevent infection. Remove gloves and wash hands again. This step ensures the catheter remains stable and reduces the risk of complications or accidental dislodgment.

Maintenance and Care
Regularly clean the catheter and surrounding area with alcohol pads to prevent infection. Inspect the site daily for signs of redness, swelling, or fluid leakage. Ensure the catheter remains securely in place and keep the area dry to promote healing and prevent complications.
5;1 Cleaning the Catheter and Surrounding Area
Thoroughly clean the catheter and surrounding skin with alcohol pads before and after each use to prevent infection. Gently wipe the access tip and valve opening, ensuring no contamination occurs; Avoid touching the access tip to maintain sterility. Regular cleaning helps prevent bacterial growth and promotes healing. Always clean in a well-lit area and dispose of used materials properly. This step is critical for maintaining catheter functionality and patient safety.
- Use alcohol pads to clean the catheter and surrounding area.
- Avoid touching the access tip to prevent contamination.
- Clean before and after each use to reduce infection risk.
5.2 Regularly Checking for Complications
Monitor the catheter site daily for signs of infection, such as redness, swelling, or pus. Check the fluid for unusual colors or odors, indicating potential infection. Watch for shortness of breath or chest pain, which may signal complications. Caregivers should assist in observing these signs and documenting fluid output. Regular checks help identify issues early, ensuring timely medical intervention and preventing serious complications like infections or blockages. Stay vigilant to maintain patient safety and catheter functionality.
- Look for redness, swelling, or pus at the catheter site.
- Monitor fluid for unusual colors or odors.
- Watch for breathing difficulties or chest pain.
- Caregivers should assist in observing and documenting.
Troubleshooting Common Issues
Address issues like pain, slow flow, or blockages promptly. Stop drainage if pain occurs and contact your doctor. Check for kinks or obstructions in the line. Monitor for signs of infection or fluid leakage, ensuring proper catheter care to prevent complications and maintain functionality.
- Stop drainage if pain occurs and seek medical help.
- Inspect the line for kinks or blockages.
- Monitor for infection signs or fluid leakage.
6.1 Dealing with Pain or Discomfort
If you experience pain during drainage, stop immediately and contact your doctor. Pain may indicate improper technique or catheter placement. Use the clamp to control flow if discomfort arises. Avoid forcing drainage, as this can worsen pain or cause injury. Always follow guidelines to prevent complications and ensure safe drainage. If pain persists, seek medical advice promptly.
- Stop drainage if pain occurs.
- Contact your doctor for assistance.
- Use the clamp to control flow if needed.
6.2 Managing Slow or Stopped Fluid Flow
If fluid flow slows or stops, check for kinks in the tubing or blockages. Ensure the vacuum bottle is properly sealed and not full, as this can halt drainage. Gently adjust the catheter position if necessary. If flow does not resume, consult your healthcare provider for assistance. Avoid forcing drainage, as this may cause complications.
- Check for tubing kinks or blockages.
- Ensure the vacuum bottle is sealed and not full.
- Gently adjust catheter position if needed.
- Contact your doctor if flow does not resume.
Understanding Drainage Limits
Do not drain more than 1,000mL from the chest or 2,000mL from the abdomen in one session. Exceeding these limits can lead to complications and discomfort.
7.1 Maximum Fluid Volume Per Session
The maximum fluid volume to drain per session is 1,000mL for chest drainage and 2,000mL for abdominal drainage. Exceeding these limits can cause discomfort, dizziness, or complications. Always monitor fluid flow and stop if you experience pain or if the flow slows significantly. Your goal is to drain safely within these guidelines to avoid potential health risks and ensure effective fluid management.
7.2 Importance of Not Over-Draining
Over-draining can lead to serious complications, such as dizziness, nausea, or chest pain. It may also cause lung collapse or low blood pressure. Always adhere to the recommended volume limits and stop immediately if you experience discomfort. Proper drainage balance ensures patient safety and prevents unnecessary medical interventions. Monitoring fluid flow and volume is crucial to avoid over-draining and maintain overall health.
Scheduling and Frequency
Regularly schedule drainage sessions based on fluid accumulation. Monitor symptoms like shortness of breath to determine the frequency. Adjust timing as needed to maintain comfort and effectiveness.
8.1 Creating a Regular Drainage Schedule
A regular drainage schedule helps manage fluid buildup effectively. Patients should track symptoms like shortness of breath or discomfort to determine when drainage is needed. Typically, drainage is performed every few days, but this may vary based on individual needs. Consistency is key to maintaining comfort and preventing complications. Always consult your healthcare provider to establish a personalized routine that suits your condition.
8.2 Adjusting Based on Fluid Accumulation
Monitor fluid buildup and adjust drainage frequency accordingly. If symptoms like shortness of breath increase, more frequent drainage may be needed. Conversely, if fluid accumulation slows, less frequent sessions can be considered. Always avoid exceeding the maximum recommended volume per session. Consult your healthcare provider to tailor adjustments to your specific condition, ensuring safe and effective fluid management.
Safety Precautions
Preventing infection and avoiding air entry into the catheter are critical. Always monitor drainage to ensure safety and prevent complications. Adhere to sterile techniques and guidelines to maintain safety.
9.1 Preventing Infection and Contamination
To prevent infection, always clean the catheter site with antibacterial soap and rinse thoroughly. Use alcohol pads to clean the access tip before and after use. Wash hands with soap and water before handling the catheter or supplies. Avoid touching the access tip to prevent contamination. Secure the catheter properly to avoid irritation or movement, which can increase infection risk. Regularly inspect the site for redness, swelling, or drainage, and report any signs of infection to your doctor immediately.
9.2 Avoiding Air Entry into the Catheter
Preventing air entry into the catheter is crucial to avoid complications, such as pneumothorax or infection. Always keep the catheter below chest level during drainage to prevent air from entering the pleural space. Ensure the vacuum bottle is sealed tightly and the clamp is closed when not in use. If air accidentally enters, stop the process immediately and consult your healthcare provider for guidance. Caregiver assistance can help maintain proper technique and safety.
Caregiver Assistance
Caregivers play a vital role in assisting patients with PleurX catheter drainage. They help with setup, provide emotional support, and ensure the process is done safely and correctly. Their involvement is especially important during initial use to build patient confidence and maintain proper technique.
10.1 Role of Caregivers in Drainage Process
Caregivers are essential in assisting patients with the PleurX drainage process. They help prepare supplies, ensure sterility, and monitor fluid flow. Caregivers also provide emotional support, assist with connecting drainage lines, and aid in securing the catheter post-drainage. Their role is crucial for maintaining patient safety and adherence to proper drainage techniques, especially during the initial learning phase of managing the catheter at home.
10.2 Ensuring Patient Comfort and Safety
Caregivers must prioritize patient comfort and safety during drainage. They should assess discomfort, stop drainage if pain occurs, and ensure proper hygiene. Using gloves and cleaning the catheter site with alcohol pads prevents infection. Monitoring for signs of complications like redness or swelling is crucial. Emotional support and reassurance help reduce patient anxiety, ensuring a smooth and safe drainage process.
Follow-Up and Medical Consultation
Regular follow-ups with your doctor are crucial to monitor catheter function and overall health. Schedule routine check-ups and report any signs of complications or drainage issues promptly.
11.1 When to Contact Your Doctor
Contact your doctor immediately if you experience sharp pain, difficulty breathing, or fever. Also, reach out if fluid flow stops suddenly, drainage exceeds recommended limits, or signs of infection appear, such as redness or swelling around the catheter site. Regular updates ensure proper catheter function and address potential issues early, preventing complications and maintaining your health.
11.2 Scheduling Routine Check-Ups
Regular follow-up appointments with your doctor are crucial to monitor catheter function and overall health. Schedule check-ups every 1-3 months or as advised by your healthcare provider. During these visits, your doctor will assess fluid drainage, check for complications, and determine if the catheter is still needed. Routine check-ups ensure the catheter remains effective and helps avoid potential issues, maintaining your safety and comfort throughout the treatment process.
Proper use of the PleurX catheter ensures effective fluid drainage, improving comfort and health. Always follow guidelines, maintain sterility, and schedule regular check-ups for optimal results and safety.
12.1 Summary of Key Points
The PleurX catheter is a safe, effective tool for managing excess fluid at home. Proper training, sterility, and caregiver assistance are crucial for successful use. Regular drainage schedules, avoiding over-draining, and monitoring for complications ensure patient safety. Always follow guidelines to prevent infections and maintain catheter function. Proper closing, dressing, and hygiene practices are essential. Consult your doctor if issues arise, and schedule routine check-ups for optimal outcomes.
12.2 Final Tips for Successful Drainage
Always follow the manufacturer’s guidelines and maintain a clean environment to minimize infection risks. Keep a record of drainage volume and schedule regular medical check-ups. Stay hydrated and monitor for any signs of complications. Ensure all supplies are ready before starting, and consider having a backup plan. Use a timer to avoid over-draining and plan for emergency contacts. Regularly inspect the catheter for wear or damage and maintain a healthy diet to support overall health.